Car Decal Installation: Professional Tips and Tricks
- July 10, 2025
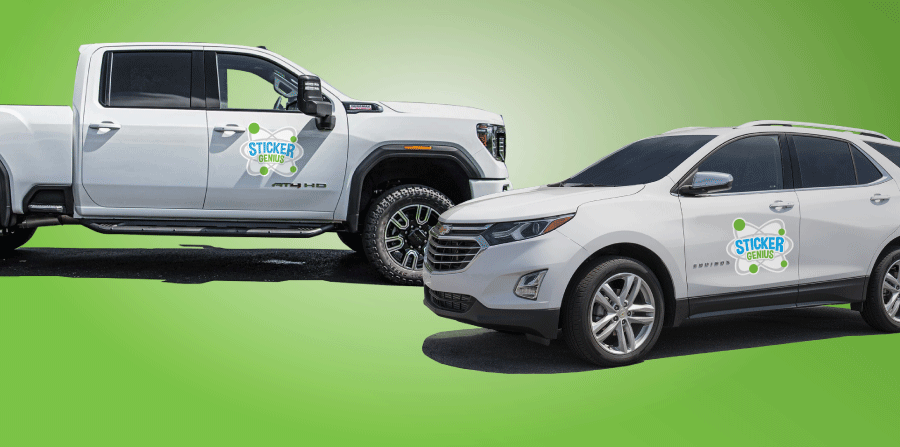
Custom car decals aren’t just a way to make your business’s vehicle look cool. They’re a solid way to attract attention and future business. Studies show that vehicle advertising in general, can generate up to 70,000 impressions per day, simply driving the same routes it would be on any normal day.
So, if you’re looking for fresh ways to garner more leads, or awareness, car decal installation could be for you. Of course, like any advertisement, the quality of your design and application will affect that campaign’s ultimate success. That’s why the experts at StickerGenius have put together the ultimate guide to vehicle graphics application.
Here, we’ll dive deep into professional and DIY approaches of applying car decals, including how to prep for the job, where to purchase durable vinyl decals, and the top tips for troubleshooting common issues. So, keep reading as we walk you through the steps for a flawless car decal installation, from prep to finishing touches.
Step 1: Choose the Right Decal
First up? For the application to go smoothly, and for the vehicle fleet graphic campaign to have the most success it’s crucial to choose the right decal. To do so, consider your end goal or use case you’re trying to achieve. Will your car decal application be for branding your business? A personal design for fun or flair? Or a temporary promotion?
Answering these questions will help you decide which type of sticker or decal to go with from the start. Leading sticker manufacturers, like StickerGenius offer a wide range of vehicle decal materials and types to consider, and knowing what the purpose of yours will be, will help make the decision on which to choose.
For instance, StickerGenius offers removable car decals for more temporary or seasonal promotions, or more permanent options for continuous branding. If you’re not going with a reputable provider, such as StickerGenius, then be sure to ask about the weather-resistant finishes of the sticker, to ensure thye hold up to UV, rain, and road wear.
Step 2: Gather Your Tools and Set the Stage
The next step for a seamless vehicle graphics application will be collecting the tools you’ll need to complete the job. Have no fear, there’s no specialized tool you’ll need to specially buy - the tools you’ll need most households or businesses already have on hand, including:
- Squeegee or application card (included with StickerGenius orders!)
- Masking or painter’s tape
- Spray bottle with mild soap and water
- Isopropyl alcohol (70% or higher)
- Clean microfiber cloth
- Optional: heat gun or hair dryer
Then, it’s time to set the stage! Your car decal installation area should be clean, and in a shady area away from wind, or dust. Garages, or garage bays are ideal. Keep in mind, for the utmost success in application, you’ll also want to avoid installing in temperatures below 60°F or above 85°F for best adhesion.
Step 3: Surface Prep Is Key
Next up, is ensuring your surface is completely clean to move forward with application. This is highly regarded as one of the most important steps of the process, as any dirt, wax, or oil on the vehicle can prevent proper adhesion. To ensure it’s clear and ready, first start by washing the area with soap and water, rinsing it thoroughly, and letting it dry.
Once dry, use the isopropyl alcohol to remove any invisible residue—especially wax or polish. You can do so by applying the alcohol to the microfiber cloth, or other, and simply wiping it over the area where you’ll apply the sticker. Pro tip? Avoid using glass cleaners as they leave behind film or an ammonia, and always ensure the area is completely dry before applying!
Lastly, if you’ll be applying to windows that are tinted, be sure to remove tint film bubbles or any imperfections beforehand for a smooth vehicle graphic application.
Step 4: Position & Align the Decal
The best way to tackle your car decal installation, is by using what’s known as the “hinge method”. This starts with positioning and aligning your decal in the place you’d like to adhere it. Start by laying the decal flat, and taping it in place. Next, you’ll apply a long strip of tape along the top edge that’ll act as a hinge, holding the decal in place.
At this point, you’ll want to step back to double-check placement, leveling, and symmetry, to ensure everything is aligned how you want it before actual application. While we’ll dive deeper into application tips, to continue the hinge method here, you’ll flip up the decal by lifting the bottom of the decal away from the surface like you’re opening a door upward, to slowly remove the backing and pressing the decal slowly onto the surface with a squeegee or card.
Step 5: Apply Using Wet or Dry Method
Of course, before you make the final application, it’s best to think about whether using a wet or dry method will be better for your application. Next, let’s cover the details of both, and how to complete your car decal installation using the preferred method for your sticker type.
Wet Application
Wet applications are recommended for larger decals, and beginner applicators.
- Lightly mist the application area and adhesive side of the decal
- Gently position decal and squeegee from center outward, removing bubbles and excess fluid
- Let it set for several hours before removing transfer tape
Dry Application
Dry vehicle graphic application is recommended for smaller decals, or those who have applied a decal to a vehicle, previously.
- Peel and stick gradually, using the squeegee to press and smooth as you go
- Start from one edge and move slowly to avoid creases
- Use overlapping squeegee strokes and firm pressure
Pro tips for both application types:
- Always peel the backing at a sharp angle
- Use heat lightly around curved areas to improve adhesion
- Purchase high-quality decals from providers like StickerGenius that are designed for smooth, bubble-resistant application—even for first-timers!
Step 6: Prevent and Remove Bubbles
If you’ve finished your application and notice bubbles…have no fear, bubbles are fixable! While it’s best to prevent them during application, but using firm, overlapping squeegee strokes as you apply the decal, there are ways to fix them if they occur anyways.
- For small bubbles:
- Pop with a pin and press flat
- Or use a heat gun on low to relax the vinyl
- For larger bubbles:
- Re-lift that section if possible and reapply with wet method
- Smooth with squeegee or palm of hand
Step 7: Let It Set & Maintain Properly
The final step to complete car decal installations, is to let your work set, for at least 24 hours before washing your vehicle. In fact, it’s best to avoid automatic car washes for the first few days, if possible. Then, proper maintenance is crucial to the longevity or your decal.
Moving forward, hand-wash the area gently with soap and water, and avoid pressure-washing the decal edges. One optional additional step, may include applying an edge sealer or clear coat for high-speed or high-wear vehicle graphics.
Car Decal Installation Troubleshooting Tips
Finally, to finish our guide, let’s walk through some of the most common issues and how you can troubleshoot them for the utmost success.
- Lifting edges: If your decal is experiencing lifting edges, that means the surface may have not have been cleaned thoroughly or was too cold during application. Apply heat, and repress to troubleshoot.
- Creases or folds: Have creases or folds? Gently lift the sticker and reapply using wet method.
- Cloudy film: Cloudiness can be common after wet install, and have no fear, it will disappear as it dries.
- Adhesion issues: If you had general issues with adhesion, let the decal rest at room temperature and try using more squeegee pressure.
The Final Word: StickerGenius for Car Decal Installation & Beyond
As you can see here, installing car decals doesn’t have to be intimidating. With the right materials, tools, and techniques, it’s simple to achieve professional-looking results with a DIY application. The most important thing to keep in mind, whether customizing your personal ride or branding a fleet of business vehicles, is selecting the right vehicle graphic manufacturer for long term quality and results. At StickerGenius, we specialize in high-quality, custom-cut vinyl vehicle graphics made to order. Our decals are durable, repositionable, and designed with easy installation in mind. From small car decals, to a full wrap kit, our team is here to help! Ready to get started? Order your custom car decals from StickerGenius today and drive your message further.
Free Shipping
All U.S. orders over $99 receive free shipping (Excluding Hawaii and Alaska). Expedited shipping options available.
No Minimum
Yes, that's correct. We will print any size order you need. Order quantity 1 or 1,000,000
Fast Turnaround
Standard turn around ships within a week. Request rush production for faster turnaround.
Made in the USA
All stickers proudly produced in The Genius Lab by our "Stickologist" just north of Detroit.