


Description
Creative Sizing And Designs
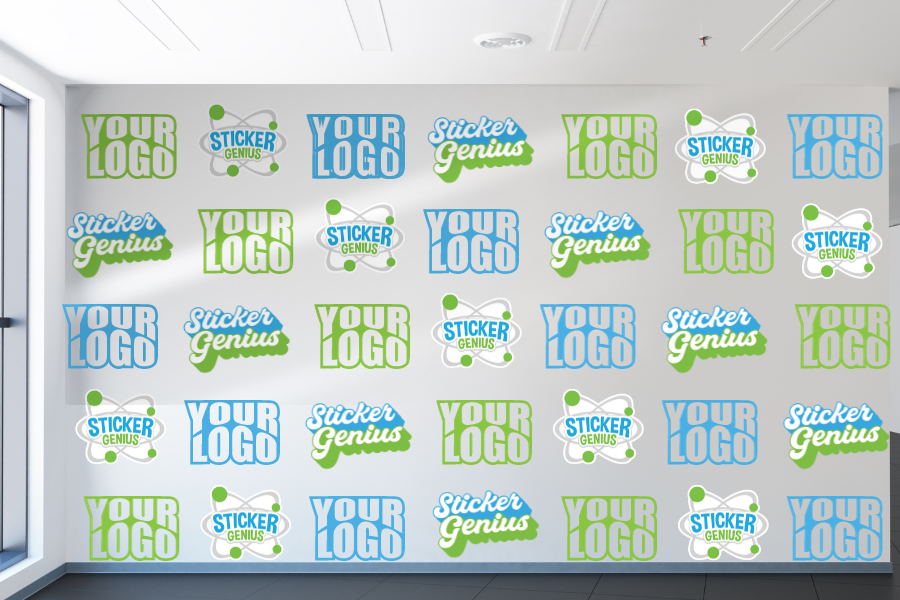
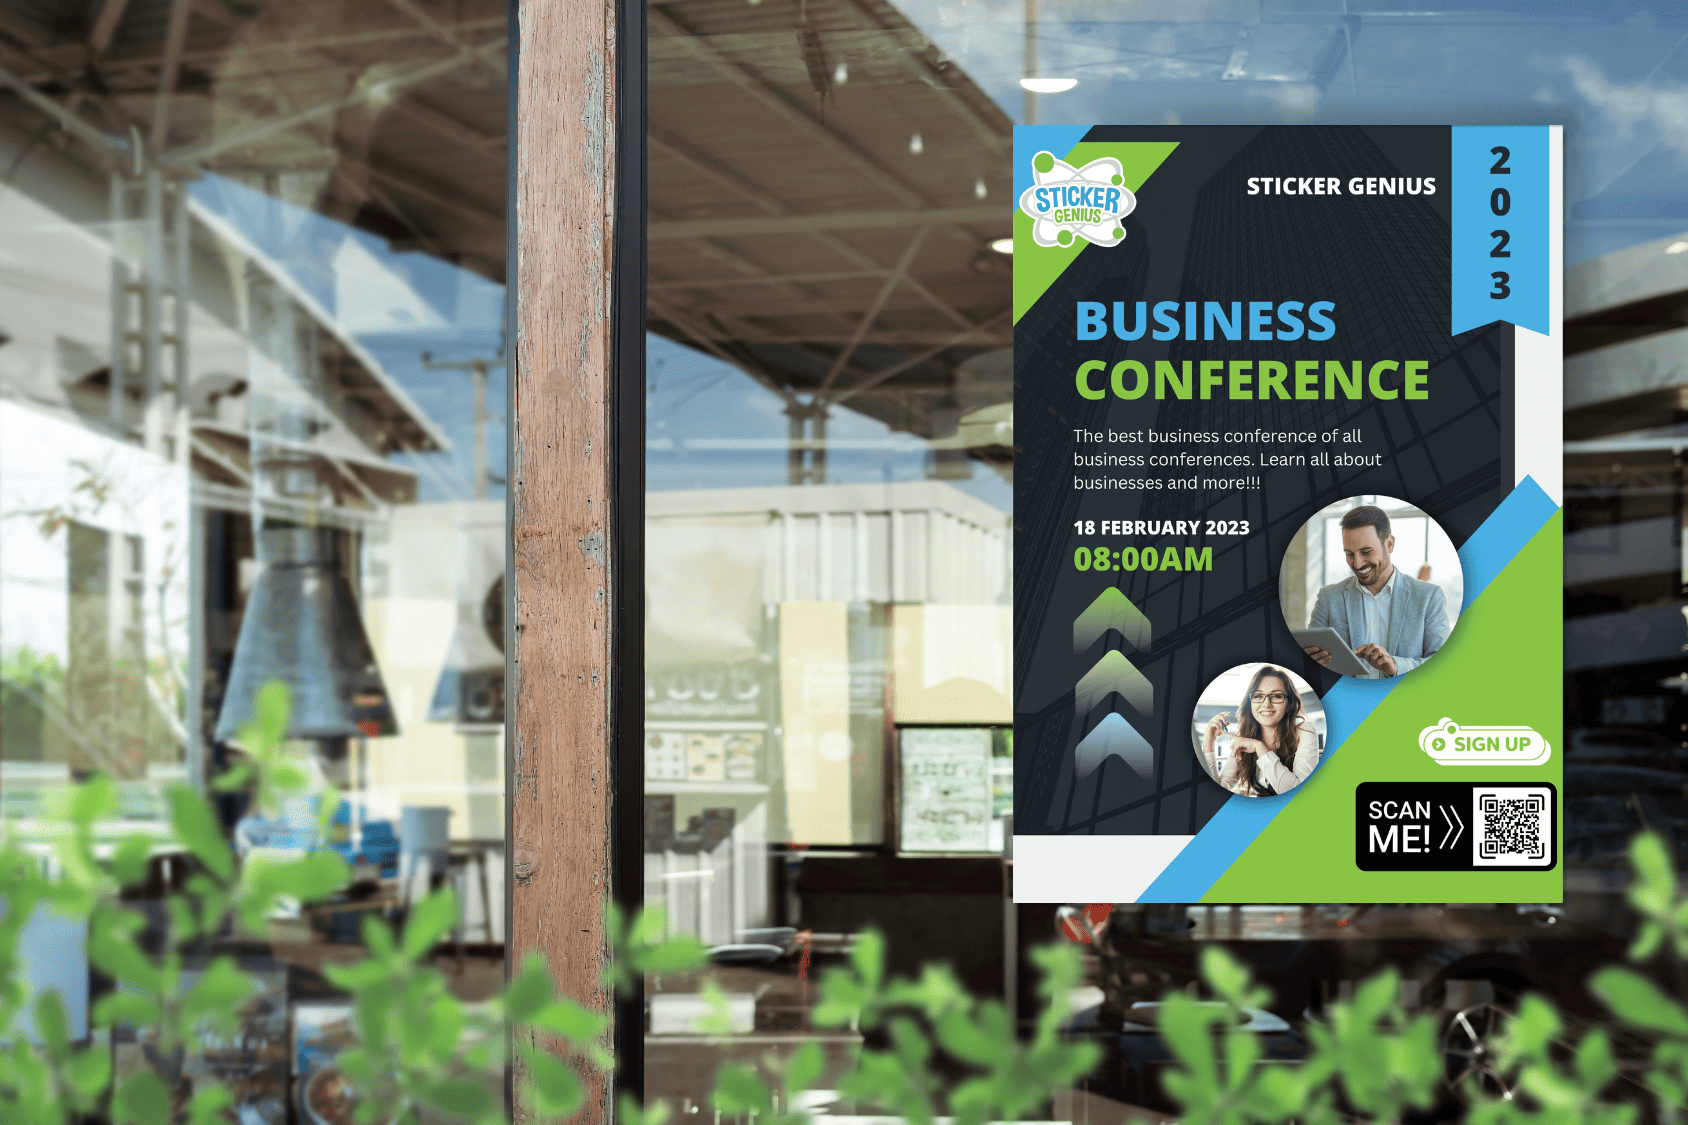
Create a painted on look to your wall by using our conforming custom vinyl wall decals. Our unique material will allow you to conform the decal into every crack on your wall. Great for concrete, sidewalks, cinder block, or brick. Our outdoor wall decals will definitely attract the attention of your customers. With our quality graphics options, we can make any variety of custom vinyl wall decals and graphics appear seamless and immersive. We only use the highest quality materials to establish the desired effect, and we are proud of the way our outdoor wall decals can look on your property. No matter the specific details you want to take care of, our company can help with all types of sizing options for your walls. We offer packages for smaller sections and entire facade makeovers, allowing you to maximize your results the way you want.
Colors Built to Last
We only use durable materials for our outdoor wall decals. When you work with our company, you can expect the final product to last as long as it is needed because our signage is able to withstand all types of weathering and regular wear and tear. You can call Sticker Genius today to find out more about some of our projects and plans. We are always looking forward to helping new clients, and we believe that we can help you get the results you want no matter the nature of the project. If you are not sure where to begin, you can contact our experts to find out more about your options on our custom outdoor wall decals. We are dedicated to helping our clients understand what they can do with their walls, and we will be sure to walk you through the print process for our custom vinyl wall decals from start to finish.
How To Install Conforming Vinyl On Textured Surfaces
Our Conforming Decals are ideal for applying long term prints to concrete, mild stucco texture, cinderblock, brick, etc. The conforming properties of this decal will allow you to display your print with a “painted on” look once applied.
For installation of our conforming decals it’s recommended to use these tools to apply:
- Heat gun (capable of heating up to 700-1000 degrees Fahrenheit)
- Foam rollers
- Scissors or Exacto knife
- Tape measure
- Painter’s tape or similar to position on surface (use stronger tape if your surface is very textured hard to stick to)
Surface Preparation
Since this is a textured surface, make sure that your surface does not have any broken pieces of brick, mortar, or any debris that may prevent the decal from being conformed to the surface.
How To Install (Simple Method – for smaller prints)
For this method simply remove liner from entire print and position on surface. Then begin heating and conforming instructions as shown below (skip to step 7).
How To Install (Hinge Method – for larger prints)
The steps below are describing a print that has portrait orientation (taller than it is wide). We’ll be working from top to bottom. If your print has landscape orientation (wider than it is tall). You will want to follow these same instructions, but your hinge would be a vertical hinge for working left to right rather than top to bottom.
Using the Hinge Method For Conforming Vinyl
For textured surfaces heat gun (not a hair dryer) must be used to conform vinyl while installing. Then a heat resistant foam roller is used to conform and adhere the heated vinyl to a textured surface.
1: Position
Make any measurements that may be needed to position graphic in the correct spot for install. For example, find an edge of a wall corner on top, bottom, left or right that you want to use as your level line. Then measure and place tape on surface to where the liner of the print will align to.
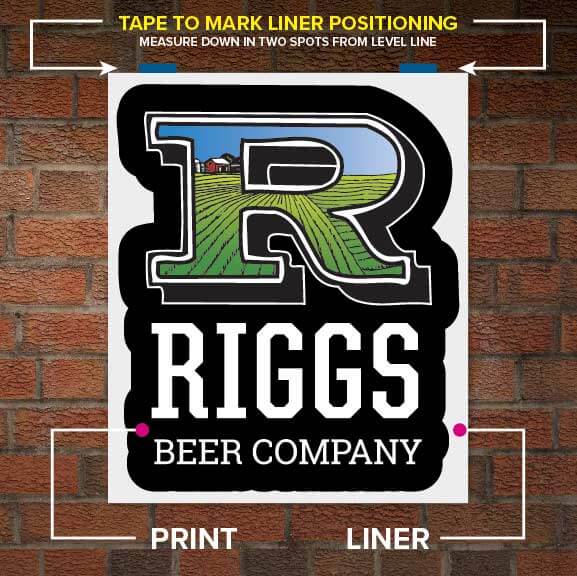
2: Apply Hinge
Once in position use tape to temporarily mount the graphic to the surface. It’s recommended to apply a “hinge” approximately in the middle of the print. If using very strong tape you will not want to tape the front of the print itself. Combination of tape such as painters tape and Gorilla tape may be needed to hold print in place.

3: Removing Top Liner
Then starting on the top (for prints that are taller than they are wide) pull print about 1/4 to 1/2 of the way from the liner and cut and remove the liner. For prints that are wider than they are tall, you will want to start from the left or right side and place vertical hinge in the middle.

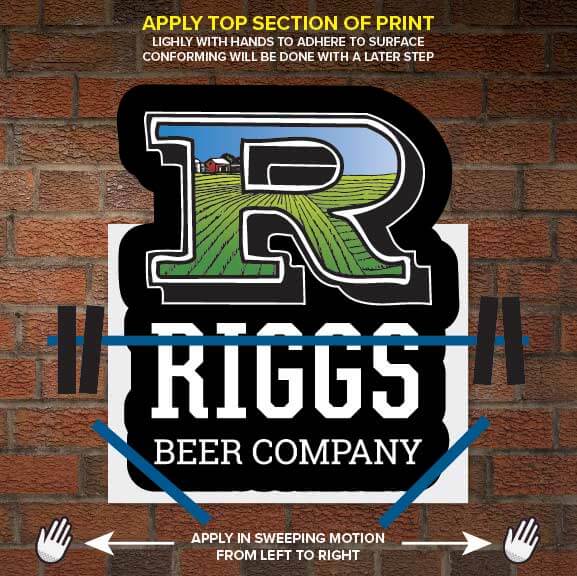
4: Apply Top Section
Starting at the hinge begin applying the print to the surface lightly by hand. Swiping in a left to right motion to evenly apply to the surface.
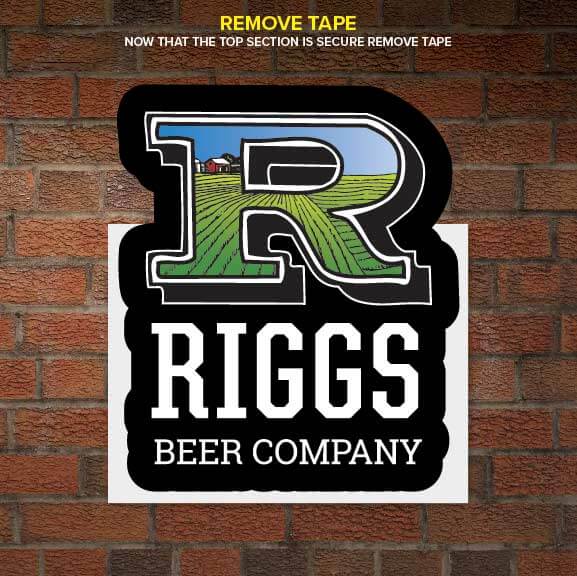
5: Remove Positioning Tape
Remove any tape from initial positioning including the hinge.
6: Remove Liner and Apply Rest Of Print
You can easily remove liner by rolling up from the bottom (reverse roll) up to where print has already been adhered, or simply reach behind and curl liner to pull completely off. You can apply in swiping motion as you are removing liner, or pull liner and stick bottom left and bottom right to surface. Then apply from hinge down.

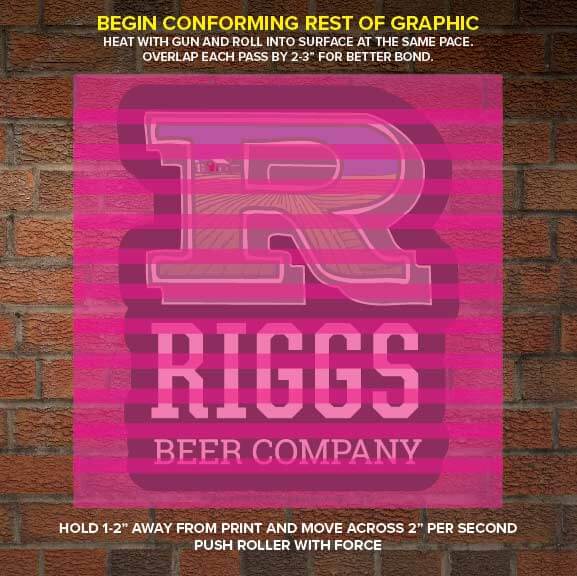
7: Apply Remaining Print
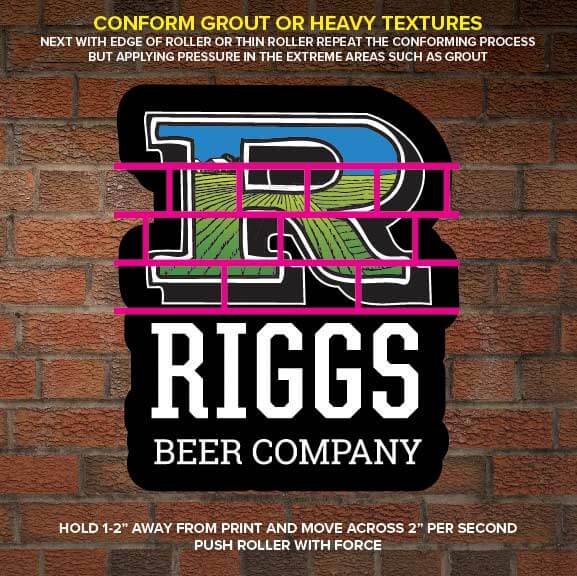
Swiping from left to right (or whatever direction grout is pointing) with heat gun and roller. Conform the rest of the print to your surface. Holding heat gun 1-2” away from print, and moving at a pace of 2” per second with roller.
8: Conform Deep Areas
With thin roller or edge of roller perform the same conforming technique to push print into deep areas such as grout, or heavy surface texture.
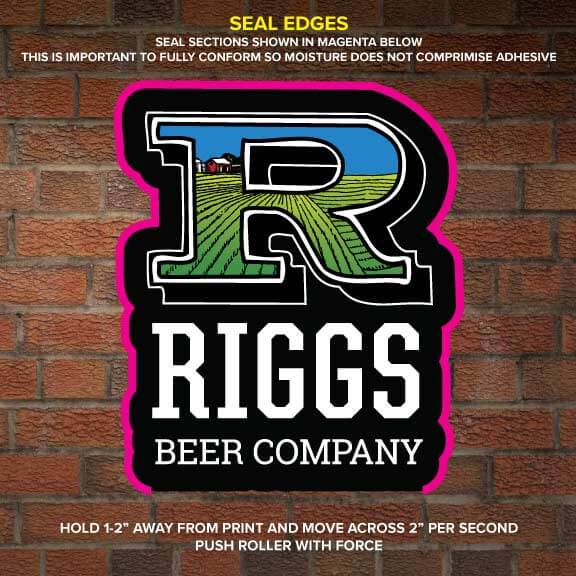
9: Seal Edges with Heat Gun & Roller
Using heat gun fully conform all sides except for one (for air to release) of the print to the surface. Holding heat gun 1-2” away from print, and moving at a pace of 2” per second with roller.
FAQ
You will need a heat gun and heat resistant foam rollers.
Heat Gun
Must be able to reach temperatures of 750 F – 1000 F for optimal adhesion / conform.
The most commonly used rolling tools are the 3M™ TSA Series
- 3M™TSA 1
4″ Wide Heat Resistant Roller - 3M™ TSA 2
1″ Wide Heat Resistant Roller with a bevel for deep curved surfaces such as grout. - 3M™ TSA 3
1″ WideHeat Resistant Cylinder Roller - 3M™ TSA-4 Two-Handed Surface Tool
which combines the heat gun with 4″ Heat Resistant Roller - RollePro Finishing Roller
These can be found via wrap supply or sign accessory companies.
With this unique adhesive it is not only long term, but removable is simple. Heat assist may be helpful upon removal. Heat or extreme climate exposure during the installations lifetime may be a factor in clean removal.
Pull from one corner and fold material back on to itself 180 degrees and begin to pull at an angle until completed.

Julie McC –
Our wall looks AWESOME now! The Concrete Conforming Wall Graphic was easy to apply, and it looks like it was professionally painted! I highly recommend! Staff was very easy to work with as well. Very impressed!
Stacey Hartwig –
The graphic looks great! It is just what we envisioned.
Allison Radkay –
Excellent product! Our new “selfie wall” looks fantastic and the graphic was easy to apply. Two of us did it in less than an hour, and after reading the instructions and watching the video, it’s pretty much foolproof. The graphic we ordered is very good quality and a great price for the large size we bought.
Phil McG –
Follow the instructions and the project was a breeze. It came out perfect.
Photographers (verified owner) –
Great Product, looks great!